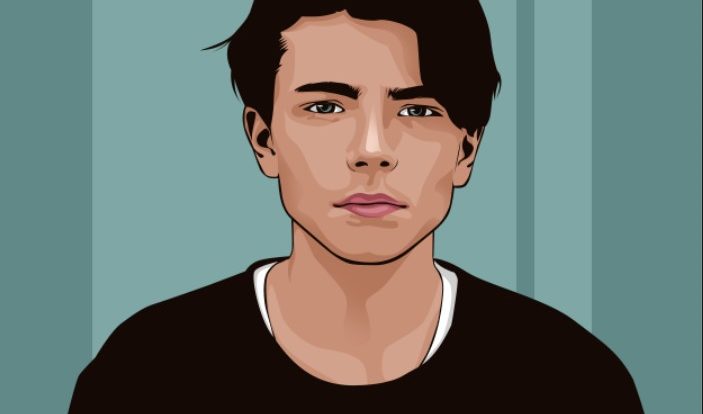
So today I’am going to show you how to make portrait vector art or cartoon photo effects in photoshop. This time we will use the Pen tool a lot, so I hope you already understand how to use it in photoshop. As for the stages of making this vector art first, we will make Line art, then add skin color, make eyes and lips. to make this really need perseverance and patience to get good results, so prepare yourself.
Before we begin this tutorial, download the following stock image.
Man Model
Step 1: Prepare Your Image
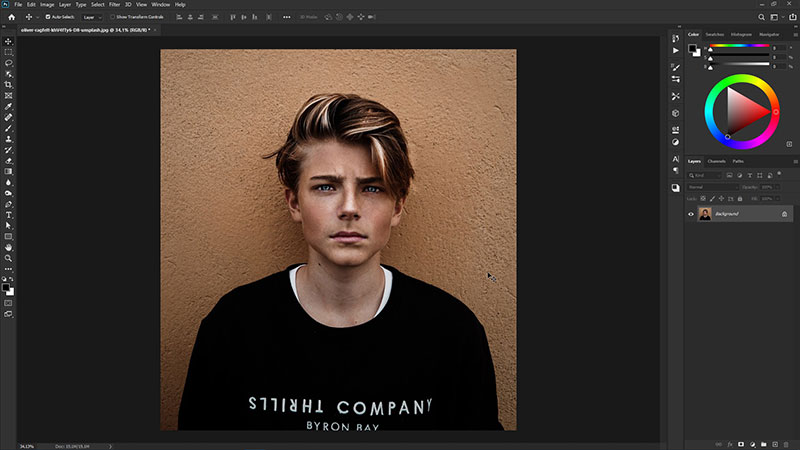
Click File> Open, then select the image file that you downloaded before. You can also drag and drop your image into Photoshop.
Step 2: Making Line Art
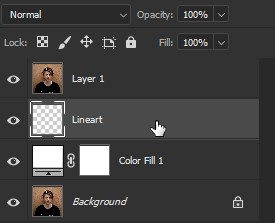
Press Ctrl+J on your keyboard to duplicate the Man layer, then create a new layer below that layer. let’s rename it as Line Art. create a new White solid color layer for the background.
Step 3: Using Pen Tool
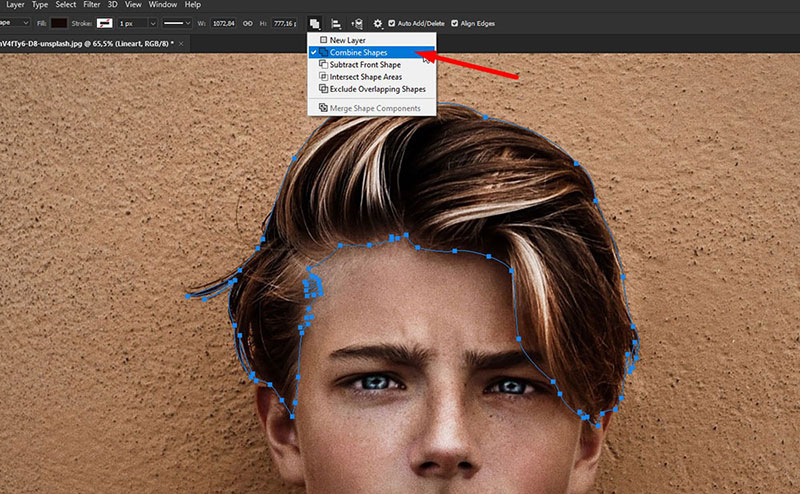
Select your Pen tool on the left tool bar or you can press P on your keyboard, then select the Shape in the top setting.

You can adjust the color as you like as long as it’s dark. so it’s easier to start making line art from the hair, parts of the face such as eyes and eyebrows, lips, ears and finally the shirt. Don’t forget to check the Combine Shapes if you use many Pen tools in one layer.
And the following image is the result of Line Art that has been finished.

Step 3: Add Skin Color
Create a new layer below the line art layer and rename it as Skin. then select the pen tool and change the color to skin color and start draw using the Pen tool in the Model skin section.

Step 4: Add Skin Shading
The next step is to add shading to the skin. But before we do that, choose the Man layer at the top, press Ctrl+U and set the Saturation to -100. it will make the image looks black & white. Next go to menu tab Image> Adjustments> Posterize and set the Levels to 5.
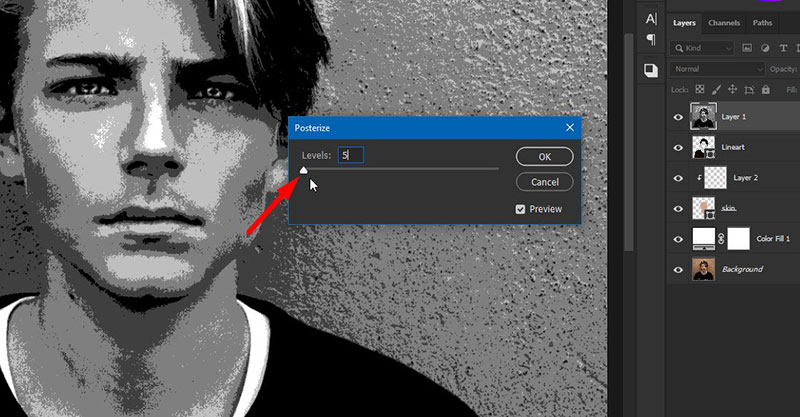
Create a new layer then right click and choose Create Clipping Mask. and start drawing and follow the dark areas on the face using the Pen tool. don’t forget to use a darker color than the previous skin color. you can create a new layer again to add more dark skin shade.

Step 5: Make Ayes and Lips
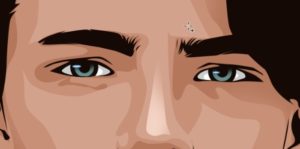
First create a new layer and rename it as Eyes. draw the eyes part by using Pen tool shape with white color. select Combine Shapes to make the left eye in one layer.
Create a new layer then right click and choose Create Clipping Mask. then Select the Ellipse tool to make eyeballs. press Ctrl+J to duplicate the layer and change the color to the light blue. for the pupils duplicate the eyeball layer again and put it above the eyeball color layer and press Ctrl+T to resize it. Duplicate duplicate the finished eyeball layers and place them on the left eye. You can add a little white to the eyes to make it look like reflected light.
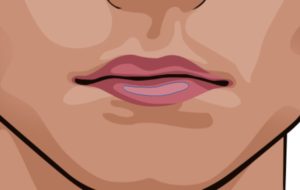
To make the lips you only need to use the same technique as before. don’t forget to adjust the color of the lips.
Step 6: Make a Background
The final step is to add color to the background. this method is quite easy, you just need to make a new Solid Color and choose the color you want. then create a new layer and select the Rectangle tool, or you can also use the Selection tool and fill it with a lighter color than the previous background color. I’m sure you can create better in this part.

Well maybe this is all I can explain for Photoshop vector art tutorials. I hope it can useful for you. And if you get into trouble please ask via the comments below.





Hi! Thsnks for your works.
I have a question about step 3. I still unable to figure out how to reach this amazing black and white effect of picture. Yes, i followed your steps but the result that i got is far from yours. My work is too rough, without some lines around eyes which outlining form, I get just utterly white or black form, i lose the character on my image cause it does not convey its essence on the picture.
May i need more thorough tutorial to get it. Thank you in advance.