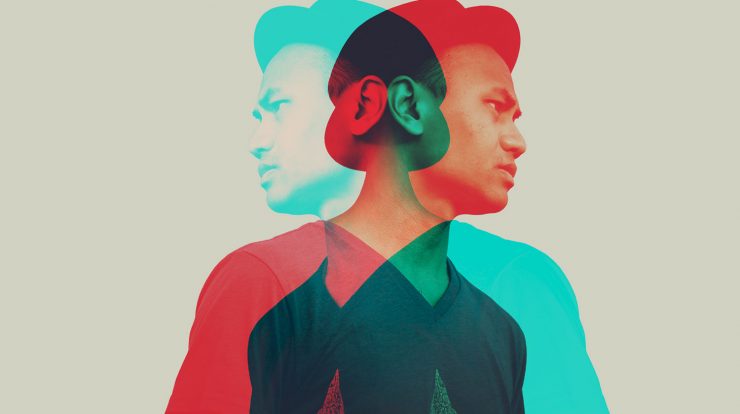
Hi friends, today we will learn how to make a double color exposure photo effect in Photoshop 2020. I think this is a simple but good effect and looks contemporary.
Before we start this tutorial download the following image first, we will use an image from Unsplash.
STEP 1: Create a New Document
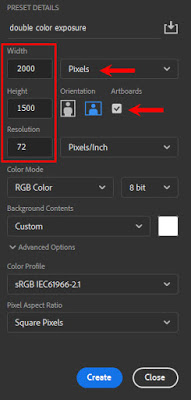
Start by creating a new document. I will use 2000×1500 Pixel document size and don’t forget to click the checklist in the Adboards section. see the picture below.
STEP 2: Remove the Background
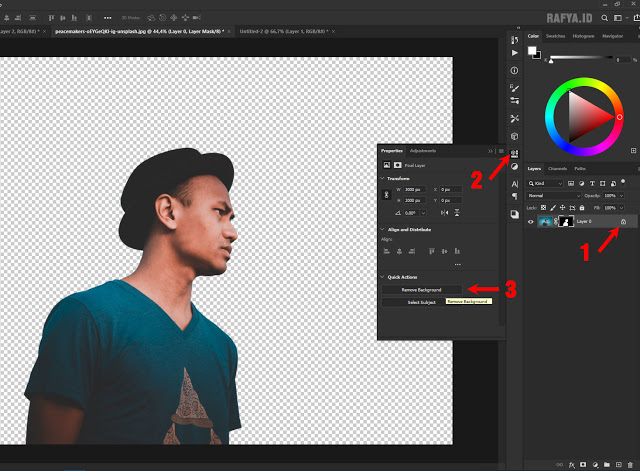
The second step is open your photo that you downloaded before into photoshop and remove the background of this photo. First you have to click the lock icon on the layer then follow the following method to quickly remove the background. if any part of the man is erased, you can use the Brush tool in white and draw it on the missing part. make sure the layer mask is selected.
STEP 3: Add Background
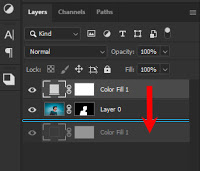
After removing the background, create a new Solid Color layer by using a grayish white color. or you can add manually the color code #d1d1d1.
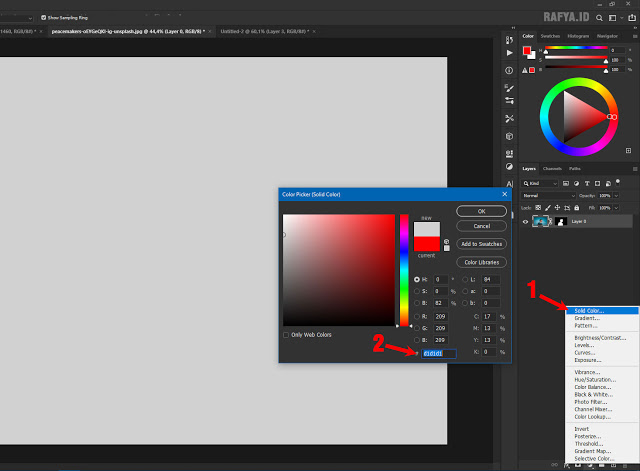
then you drag the layer under the image of the man.
STEP 4: Move Images to Document
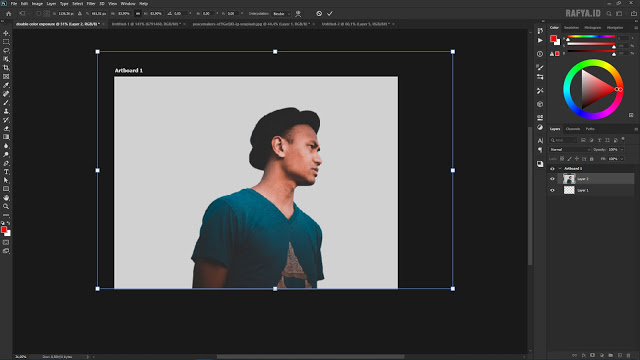
Next step is press Ctrl+Alt+Shift+E on your keyboard to merge visible the layers, then drag the image to document that we we did in step 1. press Ctrl+T to free transform and you can resize the image.
STEP 5: Blending Channels
Duplicate the Man image by pressing Ctrl+J then press Ctrl+T then right click and choose flip horizontal. And then press right click on that layer then choose Blending Options. go to advanced blending and uncheck G and B channels. and you will see the effect of double color exposure. slide and adjust the two images according to your wishes.
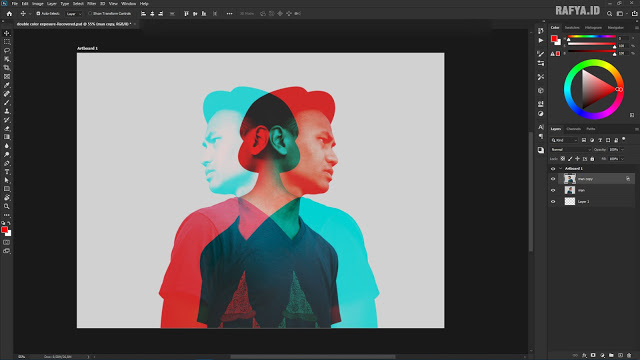
and then you can add color effects using curves, levels or gradient maps to get better results.
If you learn anything from this article, please leave your comments below.


